Creating a New Survey Analysis Project
In Uspeech Analytics, all surveys are organized as projects. A single project corresponds to a single survey.
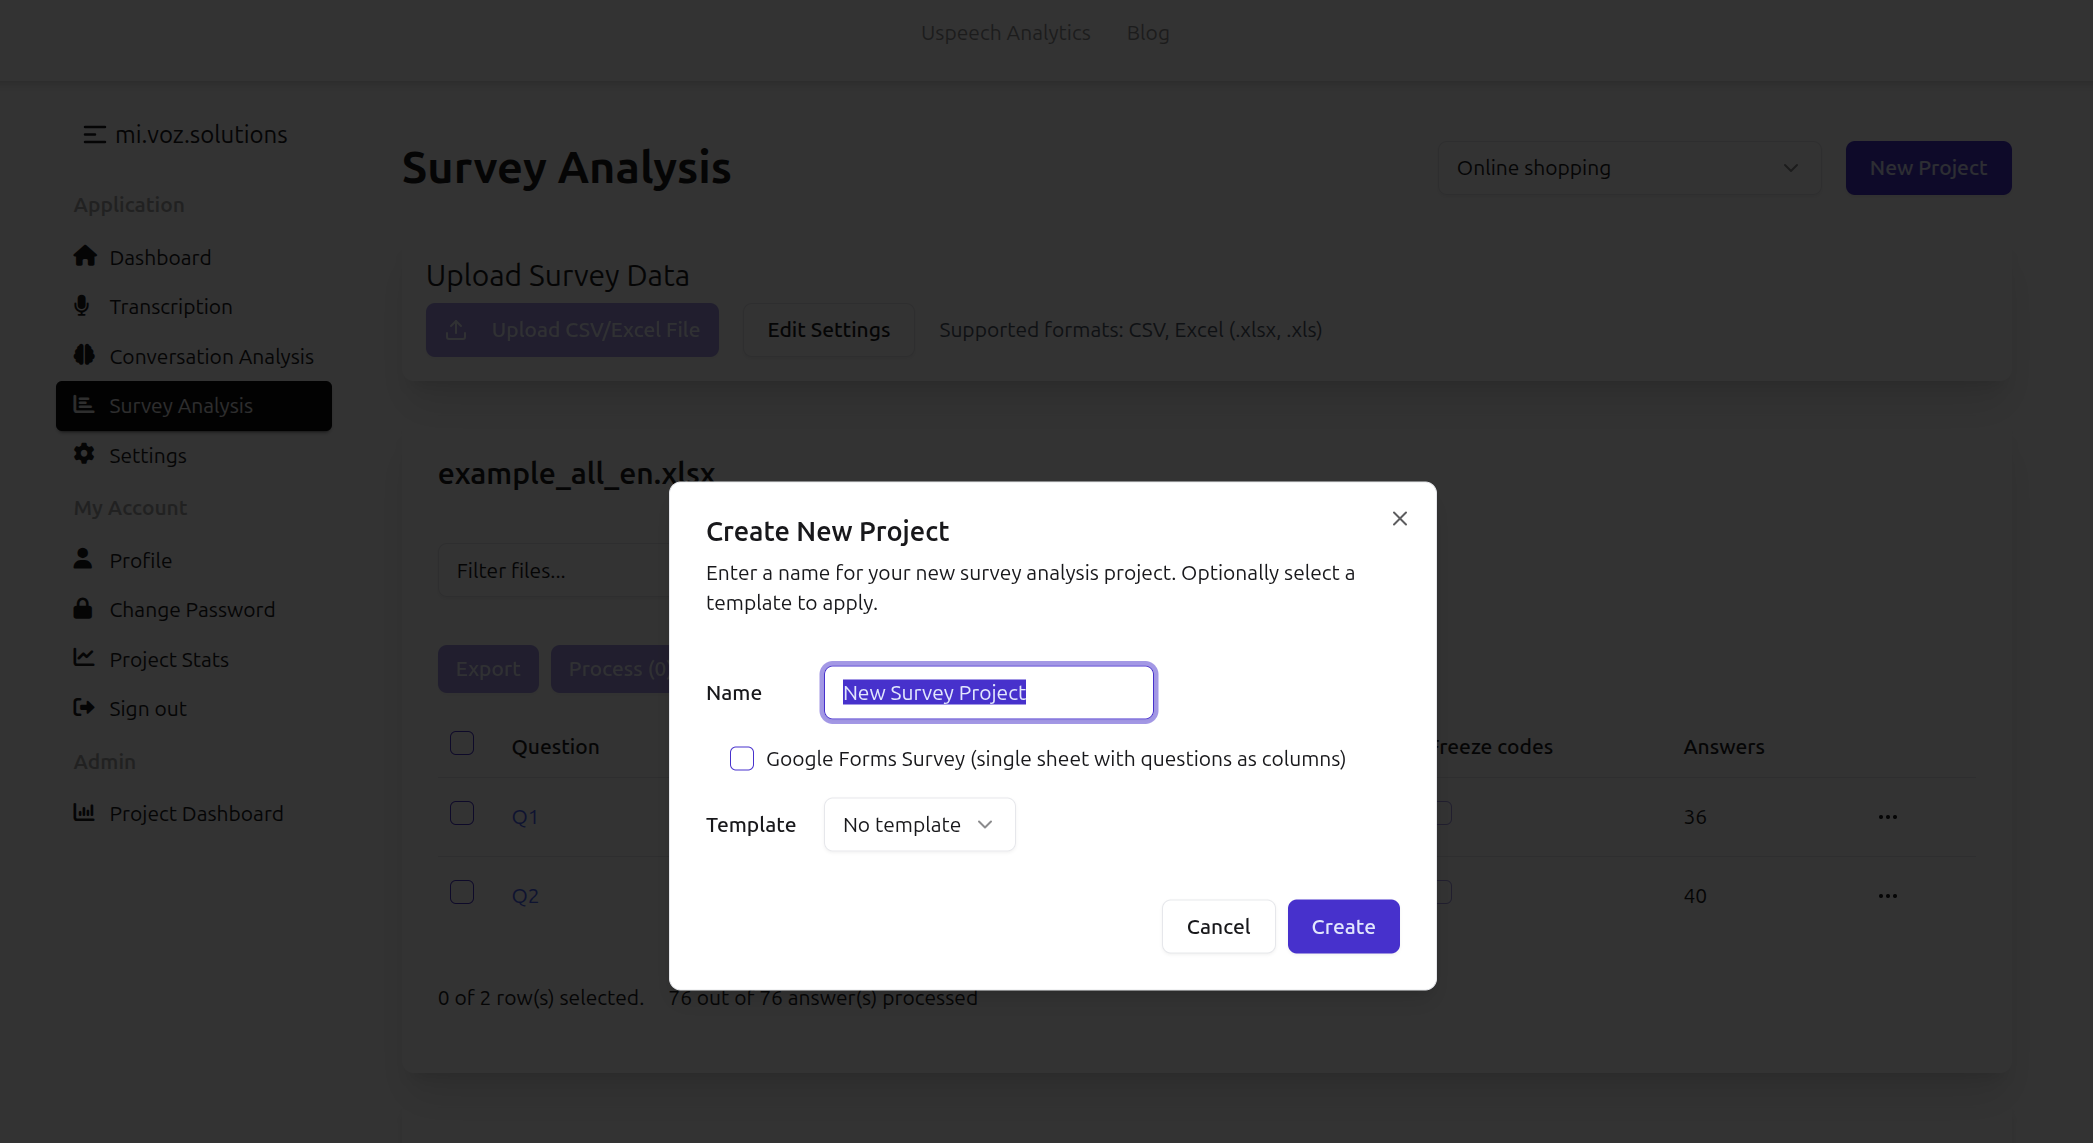
In order to create a survey analysis project, you need to select "Survey Analysis" on the left navigation bar, and then click on "New Project" on the top right.
Although any survey analysis project is created from an Excel file, the application should know the format of your data. So, few quick set up steps are required to achieve the best result.
Depending on the source platform of the survey, you'll get three main options: create a Google Forms project, create from survey analysis template or create a new project from scratch.
After creation of the project, you'll need to upload an Excel file by clicking on "Upload CSV/Excel file" button. After uploading the file, project settings dialog will appear.
Create a generic survey analysis project
When you are neither using Google Forms nor survey analysis templates, you'll need to specify all required column names manually.
The generic survey format assumes that each Excel sheet corresponds to a single open-ended question.
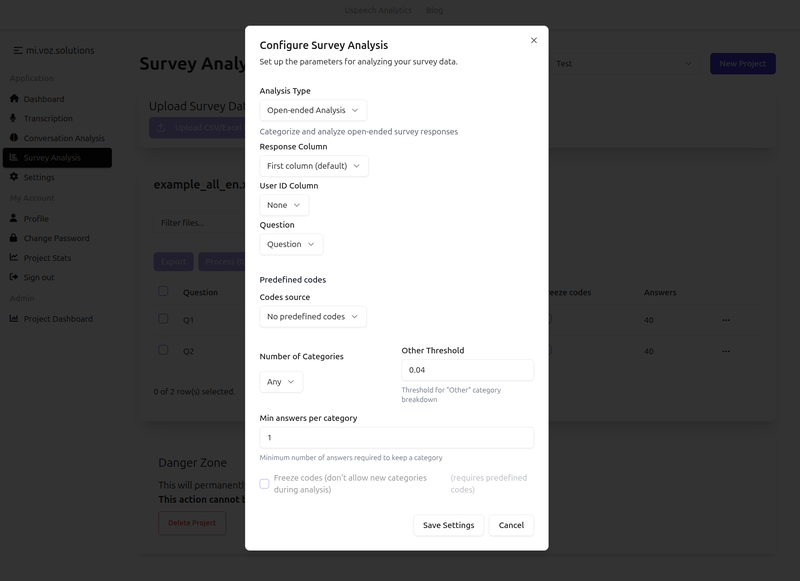
There are several settings which you need to be aware of.
Analysis type
Two main types of questions are supported:
a) generic open-ended questions
b) questions about brands (e.g. companies, shops, beverages etc.)
It is possible that one survey contains multiple types of the questions, and you'll be able to specify it per question later.
Response column
Specify column name that contains CX responses to the open-ended questions.
User ID column
Specify a column which corresponds to a unique identifier of the user.
Question
There are several ways of specifying the question.
a) in a special column on each spreadsheet - choose column name
b) Enter manually - choose "Custom" option
c) From a predefined template - choose template name. In this case, questions are linked to the corresponding sheets with answers by sheet name
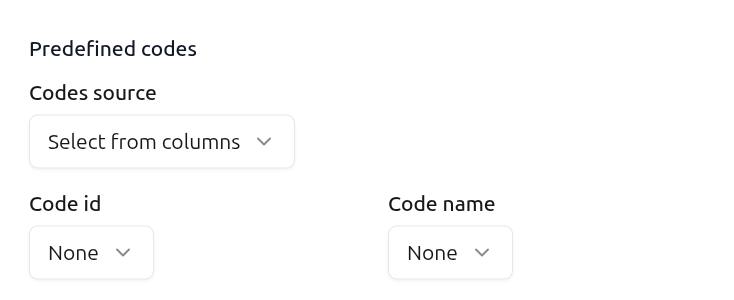
Codes source
The application allows using predefined codes (categories). You can choose predefined codes either from the Excel file, or from the set of categories you defined before in the application (see Defining New Codes section)
When choosing an option "Select from columns", you'll need to specify two columns which should be present on each sheet, that contain predefined code id and value in the "Code id" and "Code name" dropdown boxes.
Number of Categories
The tool can assign more than one category to each open-ended answer. You can limit the number of categories per answer, or allow any categories per answer.
Other threshold
In many cases when no large category cannot be assigned to the answer, a special category Other is assigned to it. However, when the analysis results contain too many questions in the Others category, such results may not be very useful. In order to fix that, you can set Other threshold to limit the maximal percentage of answers that get into the Other category. The tool will create as many categories as needed to reduce the size of the Other category.
Min answers per category
Opposite to Other threshold, this setting mitigates creation of too small categories, requiring each new category to have at least the number of answers defined by this setting (1 by default). "Min answers per category" has higher priority than "Other threshold". This parameter is not applicable to the predefined categories, if any.
Freeze codes
When using predefined codes, freezing does not allow the tool to add new categories.
After setting all the parameters, click "Save Settings". The project is ready for the analysis now, but still you can change one or more settings per question.